How I Made My Own Boho Wall Art for Under $20 (And You Can Too)
This Post Contains Affiliate Links. Please Read Our Disclosure for Full Information.
Okay let’s be real… Boho wall art is gorgeous, but have you ever looked at the price tags in those artsy stores?! $60+ for a piece of paper with squiggles?! NO THANKS.
So I did what any crafty, Pinterest-scrolling, aesthetic-loving girlie would do…
I made my own — for under $20. And the results? ✨Chef’s kiss ✨
Here’s exactly what I did to create the cutest DIY boho wall art that now lives rent-free in my living room (and my Insta feed).
🧡 What I Wanted:
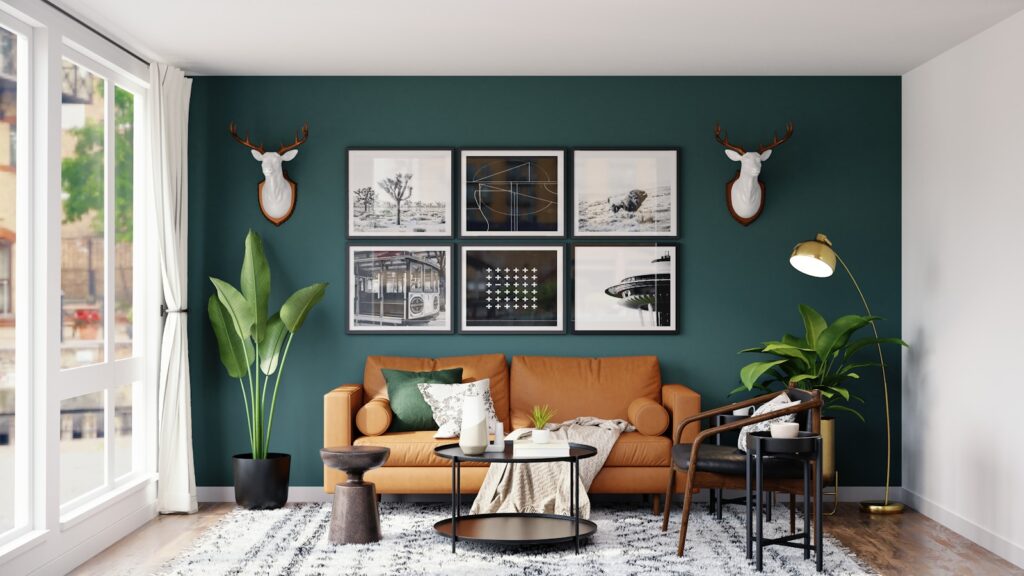
That minimalist, earthy, warm-toned boho vibe — think abstract faces, sunbursts, arches, and neutral tones. Like something out of a Pinterest board or anthropology catalog. 🌞🌾
🎨 Step 1: I Got These Cute Minimalist Prints
The secret sauce? Digital printable art. You can literally download a pack of boho-style posters and print them at home (or at your local print shop) for a few bucks. No shipping. No drama.
🖼️ This boho wall art digital set is a total vibe
It came with multiple sizes and different color tones so I could mix & match.
✂️ Step 2: I Printed Them at Home (on Thicker Paper)
I didn’t want floppy prints, so I used a slightly thicker matte cardstock — it made the colors pop and feel super high quality.
📄 This cardstock gave me museum-quality texture for cheap
If you don’t have a good printer, just save the files to a USB and take them to a local print shop.
🖼️ Step 3: I Grabbed Minimalist Frames That Look Fancy (But Aren’t)
Frames can get $$$ real quick, but I found a cute 3-pack of wooden frames that gave all the boho energy without the cost.
🪵 These wooden frames are affordable but make your art look expensive
I used 8×10” sizes for a gallery wall moment.
🪢 Optional DIY Upgrade: Add Texture with Yarn or Macramé
I hot glued some neutral-toned yarn to the corners of one frame to give it a unique 3D twist — think: tiny macramé corner moment.
🧶 This yarn pack has perfect boho colors and texture
It added such a cozy, handmade feel without any real effort.
🔨 Step 4: I Hung Everything With Command Strips (Because Rent)
No holes. No tools. Just peel, stick, and feel like an interior designer. 😌
🧲 These are the GOAT for renters + gallery walls
I arranged them in a staggered grid for that artsy, curated look.
🧠 Final Thoughts: DIY > Store-Bought
You don’t need a designer budget to have designer vibes. With a little creativity, you can turn your space into a boho dream for under $20 — and the best part?
You get to say “Yeah, I made that.” 🙋♀️
Now every time I walk into my room, it feels so me. Cozy, artsy, and ✨put together✨ (even if my life isn’t).
Stay organized with these cute, easy-to-use planners—get now for free!