

This Post Contains Affiliate Links. Please Read Our Disclosure for Full Information.
Acne breakouts and dark spots always seem to show up at the worst possible time. Maybe it’s before a big event, a date night, a vacation, or simply on a day when you want your skin to look its absolute best.
The good news? You don’t need perfect skin to achieve a flawless-looking makeup finish.
Professional makeup artists use strategic techniques to camouflage acne, redness, post-acne marks, and hyperpigmentation while still keeping makeup looking natural and skin-like. The secret isn’t applying more makeup—it’s applying the right products in the right order.
If you’ve ever struggled with covering blemishes without creating a cakey finish, these makeup tricks can help you achieve smooth, even-looking skin while still looking like yourself.
1. Start with Well-Moisturized Skin
The foundation of flawless makeup begins long before foundation touches your face.
Dry patches, flaky skin, and dehydrated areas can make acne and dark spots appear even more noticeable because makeup tends to cling to texture. Proper hydration helps create a smoother surface for makeup application.
Even oily or acne-prone skin benefits from lightweight moisturizers. Well-hydrated skin often allows makeup to blend more evenly and last longer throughout the day.
Think of moisturizer as the prep step that makes every other product perform better.
👉 Style Tip: Use a lightweight, non-comedogenic moisturizer if you’re prone to breakouts.
🛍 Shop here: Oil Free Face Moisturizer


2. Use a Blurring Primer
Primer can make a huge difference when you’re trying to create a smooth makeup finish.
Blurring primers help soften the appearance of enlarged pores, uneven texture, and acne scars while creating a more even canvas for foundation.
They also help makeup adhere better and can improve wear time throughout the day.
While primer won’t completely erase texture, it can significantly improve the final result.
👉 Style Tip: Focus primer on areas with visible pores, acne scars, or rough texture.
🛍 Shop here: Blurring Face Primer


3. Color Correct Red Acne First
Many active pimples contain redness that foundation alone may struggle to fully conceal.
This is where color correction becomes incredibly useful. Green color correctors help neutralize red tones because green sits opposite red on the color wheel.
Using a tiny amount directly on red blemishes before foundation can reduce the amount of concealer needed later.
The result often looks more natural and less heavy.
👉 Style Tip: Apply color corrector only where redness exists to avoid an unnatural finish.
🛍 Shop here: Green Color Corrector


4. Use Thin Layers of Foundation
One of the biggest mistakes people make when covering acne is applying too much foundation.
Heavy layers can emphasize texture, settle around blemishes, and create a cakey appearance. Thin layers often look much more natural while still providing excellent coverage.
Start with a light layer and build only where additional coverage is needed.
Professional makeup artists often say that strategic layering creates a better finish than one thick application.
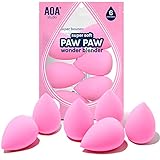
👉 Style Tip: Use a damp makeup sponge for the most natural-looking coverage.
🛍 Shop here: Makeup Sponge Blender


5. Spot Conceal Instead of Covering Everything
A flawless finish often comes from targeted concealing rather than applying heavy coverage all over the face.
After foundation, use a small brush to apply concealer directly onto acne spots, blemishes, and dark marks.
This allows the rest of your skin to remain lighter and more natural while providing extra coverage exactly where needed.
Less product often creates a more skin-like appearance.
👉 Style Tip: Choose a concealer that matches your skin tone rather than one that’s significantly lighter.
🛍 Shop here: Full Coverage Concealer


6. Let Concealer Sit Before Blending
This professional trick can significantly improve coverage.
After applying concealer to a blemish or dark spot, allow it to sit for 30 to 60 seconds before blending.
Giving the product time to settle slightly often increases its opacity and coverage.
Many makeup artists use this technique for stubborn acne marks and hyperpigmentation.
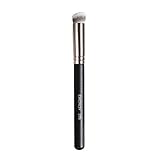
👉 Style Tip: Blend only the edges of the concealer rather than the center.
🛍 Shop here: Precision Concealer Brush


7. Set Problem Areas with Powder
Acne and dark spots often require extra longevity throughout the day.
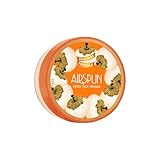
Setting concealed areas with a light layer of translucent powder helps reduce creasing, improve wear time, and prevent coverage from fading.
The key is applying powder strategically rather than heavily powdering the entire face.
Too much powder can draw attention to texture.
👉 Style Tip: Press powder gently onto blemishes instead of sweeping it across the skin.
🛍 Shop here: Translucent Setting Powder


8. Use Cream Products Carefully
Cream blushes, bronzers, and highlighters can create beautiful, skin-like makeup.
However, rubbing cream products aggressively over concealed acne may disturb the coverage underneath.
Applying cream products with tapping motions instead of dragging motions helps maintain your hard work.
This small adjustment can dramatically improve makeup longevity.
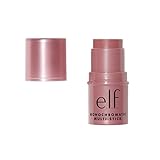
👉 Style Tip: Use a damp sponge to gently press cream products into the skin.
🛍 Shop here: Cream Blush


9. Draw Attention to Your Best Features
One of the smartest beauty tricks has nothing to do with concealing at all.
Enhancing your eyes, brows, lashes, or lips naturally directs attention away from areas you’re self-conscious about.
People tend to focus on the most visually striking feature first.
This doesn’t mean hiding your skin—it simply means creating balance within your makeup look.
👉 Style Tip: A well-defined brow can instantly make the entire face look more polished.
🛍 Shop here: Eyebrow Pencil


10. Finish with Setting Spray
After spending time perfecting your coverage, the last thing you want is for it to fade after a few hours.
Setting spray helps lock makeup in place and can reduce the powdery appearance that sometimes occurs after layering products.
Many formulas also help makeup appear more natural by blending products together visually.
The result is often a smoother, more seamless finish.
👉 Style Tip: Hold the bottle several inches away and mist lightly for even coverage.
🛍 Shop here: Long Lasting Setting Spray


Final Thoughts
Perfect skin doesn’t exist, and you don’t need flawless skin to create beautiful makeup looks.
The most effective makeup techniques focus on strategic coverage, proper skin preparation, and enhancing your natural features rather than masking everything under heavy layers of product.
With the right combination of primer, foundation, concealer, and setting techniques, you can confidently cover acne and dark spots while still allowing your skin to look like skin.
Save this post to your Makeup Tips, Beauty Hacks, or Acne Coverage Tips Pinterest board so you’ll always have these professional makeup tricks ready when you need them. 💄✨🌸
Discover more from Serenity Talks
Subscribe to get the latest posts sent to your email.


