

This Post Contains Affiliate Links. Please Read Our Disclosure for Full Information.
Jelly blush gives your cheeks a fresh, dewy flush, but its lightweight texture can be tricky to apply evenly. The wrong technique can leave streaks, harsh edges, or uneven color. These 15 jelly blush mistakes that can leave your makeup patchy will help you achieve a smooth, natural-looking finish with simple application tips.
1. Applying Jelly Blush on Dry, Unprepared Skin
One of the most common jelly blush mistakes is applying it directly to dry or flaky skin.
Jelly blush formulas often contain water-based ingredients and pigments that can settle unevenly when the skin’s surface is rough.
This may cause certain areas of your cheeks to appear darker than others.
Before applying blush, cleanse your face and use a lightweight moisturizer suitable for your skin type.
Allow the moisturizer to absorb before starting your makeup.
✨ Makeup Tip: If you have dry skin, use a hydrating moisturizer and gently pat your jelly blush onto the cheeks instead of rubbing it across the skin.
Why It Causes Patchiness: Dry patches and uneven skin texture can interfere with smooth pigment distribution.
Quick Fix: Moisturize first and apply the blush in thin layers.
Explore hydrating face moisturizers for makeup.

2. Using Too Much Jelly Blush at Once
Jelly blush can be surprisingly pigmented, even when the formula looks sheer in its packaging.
Applying too much product at once may create concentrated patches of color.
These areas can become difficult to blend, especially with quick-setting formulas.
Start with a small amount and build the color gradually.
It’s generally easier to add another layer than to remove excess pigment.
✨ Makeup Tip: Begin with a tiny dab on each cheek and blend before deciding whether you need more color.
Why It Causes Patchiness: Excess pigment can collect in one area and create uneven color intensity.
Quick Fix: Use smaller amounts and build the blush gradually.
Explore sheer jelly blush makeup.

3. Waiting Too Long Before Blending
Some jelly blush formulas begin setting shortly after application.
If you leave the product sitting on your cheeks for too long, the pigment may become harder to move.
This can create visible dots, streaks, or harsh edges.
Instead of applying blush to both cheeks and blending later, work on one cheek at a time.
Blend immediately after placing the product on your skin.
✨ Makeup Tip: Apply one small dot, blend it completely, and then move to the other cheek.
Why It Causes Patchiness: Quick-setting pigments can leave concentrated marks before they’re evenly distributed.
Quick Fix: Work in small sections and blend promptly.
Explore blendable liquid and jelly blush.

4. Rubbing Jelly Blush Instead of Tapping It
Rubbing jelly blush across your cheeks can move the product unevenly.
It may also disturb foundation or concealer underneath.
This is particularly noticeable when your base makeup hasn’t fully settled.
Try using gentle tapping or stippling motions instead.
A clean fingertip, soft makeup sponge, or suitable brush can help distribute the product without excessive dragging.
✨ Makeup Tip: Use light tapping motions from the center of your cheek outward for a softer, more diffused finish.
Why It Causes Patchiness: Rubbing can shift both the blush and the makeup underneath.
Quick Fix: Pat or stipple the product gently.
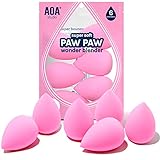
Explore soft makeup sponges for cream blush.

5. Applying Jelly Blush Over Too Much Setting Powder
Jelly blush often blends more easily over bare skin or compatible liquid and cream products.
Applying it over a heavy layer of setting powder can sometimes cause uneven color.
The blush may catch on powdery areas or disturb the matte base.
If you prefer wearing jelly blush with foundation, try applying it before setting your cheeks with powder.
However, always follow the recommended application order for your specific formula.
✨ Makeup Tip: Apply jelly blush before powder when the product instructions allow, then lightly set surrounding areas if needed.
Why It Causes Patchiness: Powder and wet blush formulas may not blend smoothly together.
Quick Fix: Use less powder or adjust your application order.
Explore lightweight translucent setting powders.

6. Choosing the Wrong Application Tool
Not every makeup brush or sponge works equally well with jelly blush.
Some dense brushes can pick up too much product, while certain sponges may absorb more formula than expected.
Using an unsuitable tool can make the blush look streaky or uneven.
Experiment with clean fingertips, a lightly damp makeup sponge, or a soft stippling brush.
Choose the method that works best with your blush formula.
✨ Makeup Tip: Test different application tools on the back of your hand before applying the blush to your face.
Why It Causes Patchiness: Uneven product pickup and distribution can create streaks or concentrated color.
Quick Fix: Switch to a soft sponge or stippling brush designed for liquid and cream products.
Explore stippling makeup brushes for blush.

7. Applying Jelly Blush Over an Unset or Slippery Base
Jelly blush can sometimes slide around when applied over a very slippery moisturizer, primer, or foundation.
If your base products haven’t absorbed or settled, the blush may move rather than blend evenly.
This can leave uneven pigment or cause your foundation to separate.
Allow each skincare and makeup layer to settle before applying the next product.
Use thin layers rather than applying several heavy products at once.
✨ Makeup Tip: If your cheeks feel excessively slippery, gently blot away excess product before applying jelly blush.
Why It Causes Patchiness: Excess product underneath can prevent the blush from adhering evenly.
Quick Fix: Use lighter skincare layers and allow adequate settling time.
Explore lightweight face primers for makeup.

8. Using a Jelly Blush Formula That Doesn’t Work Well with Your Base
Some jelly blush formulas may not layer smoothly over certain foundations or primers.
For example, a particular combination may cause pilling, streaking, or product separation.
This doesn’t mean all water-based and silicone-based products are incompatible.
Actual performance depends on the complete formulas and how they’re applied.
Test your jelly blush with your usual base products before using the combination for an important occasion.
✨ Makeup Tip: Try your foundation and jelly blush together on a small area of your cheek to see whether they blend smoothly.
Why It Causes Patchiness: Certain product combinations may separate, pill, or interfere with even application.
Quick Fix: Test a different layering technique or simplify your base makeup.
Explore lightweight skin tint makeup.

9. Applying Jelly Blush Directly from the Applicator Without Controlling the Amount
Some jelly blush products come with stick, tube, or doe-foot applicators.
Applying a large amount directly to the cheeks can create concentrated pigment in one spot.
This may be especially difficult to blend with highly pigmented formulas.
Instead, place a small amount on the back of a clean hand or a makeup palette.
Pick up the product gradually using your preferred tool.
✨ Makeup Tip: Use the back of your clean hand as a temporary mixing surface to control how much blush reaches your cheeks.
Why It Causes Patchiness: Direct application can deposit more pigment in one area than you intended.
Quick Fix: Dispense a small amount first and apply gradually.
Explore makeup mixing palettes for liquid blush.

10. Blending Jelly Blush Too Aggressively
Overblending can sometimes make jelly blush look worse rather than better.
Repeated rubbing or pressing may disturb the foundation underneath or move pigment away from the intended area.
Instead of blending continuously, use a few controlled tapping motions.
Stop once the edges look soft and the color appears even.
If you need more pigment, add a small second layer.
✨ Makeup Tip: Focus on softening the edges rather than repeatedly blending the center of the blush.
Why It Causes Patchiness: Excessive blending can lift or redistribute product unevenly.
Quick Fix: Use fewer, lighter motions and build coverage gradually.
Explore soft blending brushes for cream makeup.

11. Applying Multiple Thick Layers Without Letting Them Set
Layering jelly blush can help intensify the color, but applying too much too quickly may create uneven buildup.
Some formulas need a short amount of time to settle before another layer is added.
If you immediately apply more product, you may disturb the first layer.
Start with one thin layer and check the color.
Add another small amount only if needed.
✨ Makeup Tip: Build the color in two light layers rather than one thick application.
Why It Causes Patchiness: Heavy layering can cause uneven pigment buildup or disturb earlier layers.
Quick Fix: Use thin layers and follow the product’s recommended setting time.
Explore buildable jelly blush for cheeks.

12. Applying Jelly Blush in the Wrong Placement for Your Desired Look
Blush placement can affect how balanced and natural your makeup appears.
Placing too much product in a concentrated area may make the color look harsh.
For a soft everyday flush, begin with a small amount on the upper or central cheek area, depending on your preferred style.
Blend outward while keeping the color concentrated where you want the most intensity.
There isn’t one universally correct blush placement for every face shape.
✨ Makeup Tip: Apply less product initially and check your makeup from a normal viewing distance before adding more.
Why It Causes Patchiness: Uneven placement and concentrated pigment can make the blush appear unbalanced.
Quick Fix: Use smaller amounts and blend the edges carefully.
Explore precision makeup brushes for blush.

13. Using Dirty Makeup Brushes or Sponges
Dirty makeup tools can affect how smoothly jelly blush applies.
Old foundation, powder, oils, and dried makeup residue may interfere with product pickup and blending.
This can create streaks or uneven color.
Clean your brushes and sponges regularly according to their care instructions.
Allow reusable tools to dry properly before storing them.
✨ Makeup Tip: Use a clean brush or sponge when switching between powder products and jelly blush.
Why It Causes Patchiness: Product buildup on tools can lead to inconsistent application.
Quick Fix: Clean your makeup tools and avoid using brushes coated with old product.
Explore makeup brush cleaning supplies.

14. Choosing a Blush Shade That’s Difficult to Blend into Your Desired Finish
A jelly blush shade that’s much more intense than your intended makeup look may be harder to apply subtly.
Highly saturated reds, pinks, and berry shades can look beautiful, but they may require extra care when blending.
Start with a tiny amount and build gradually.
For a softer everyday look, choose a shade that complements your skin tone and preferred makeup style.
Remember that the color may appear different on your cheeks than it does in the packaging.
✨ Makeup Tip: Swatch the blush in natural light to understand its intensity before applying it to your face.
Why It Causes Patchiness: Strong pigment can make uneven application more noticeable.
Quick Fix: Apply less product and choose a buildable shade for everyday wear.
Explore natural looking jelly blush shades.

15. Trying to Fix Patchy Jelly Blush by Adding More Product
When jelly blush looks uneven, your first instinct might be to add another layer.
Unfortunately, applying more pigment over an already patchy area can make the problem more noticeable.
Instead, identify whether the issue is caused by too much product, disturbed foundation, or uneven blending.
Use a clean sponge to gently soften the edges.
If the patchiness is severe, remove the affected area and reapply a thin layer.
✨ Makeup Tip: Keep a clean makeup sponge nearby so you can soften uneven edges without immediately adding more blush.
Why It Causes Patchiness: Extra product can exaggerate uneven color and create buildup.
Quick Fix: Blend gently, correct the base if needed, and reapply sparingly.
Explore makeup blending sponges for liquid blush.
Jelly Blush Mistakes and How to Fix Them
Use this quick troubleshooting guide when your jelly blush doesn’t look smooth.
| Jelly Blush Problem | Possible Cause | Quick Solution |
|---|---|---|
| Blush looks patchy | Dry or uneven skin texture | Moisturize before application |
| Dark dots remain | Waiting too long to blend | Blend immediately |
| Blush looks streaky | Rubbing instead of tapping | Use gentle stippling motions |
| Color looks too intense | Applying too much product | Start with a smaller amount |
| Foundation lifts | Excessive blending | Tap gently and avoid dragging |
| Blush catches on powder | Heavy powder underneath | Adjust product layering |
| Makeup looks separated | Incompatible product combination | Test products together |
| Blush slides around | Slippery skincare or primer | Use thinner base layers |
| Pigment looks uneven | Dirty makeup tools | Clean brushes and sponges |
| Blush looks too heavy | Too many thick layers | Build color gradually |
| Harsh edges remain | Concentrated application | Soften the edges with a clean tool |
| Patchiness gets worse | Adding more product repeatedly | Correct the affected area first |
Quick Tip: The most useful habit for smoother jelly blush application is to start with less product than you think you need.
How to Apply Jelly Blush Without Patchiness
Follow this beginner-friendly routine for a smooth, natural-looking finish.
Step 1: Prepare Your Skin
Cleanse and moisturize your face.
Choose skincare products suitable for your skin type and allow them to absorb.
Step 2: Apply Your Base Makeup
If you wear foundation or skin tint, apply a thin, even layer.
Avoid excessive product buildup around the cheeks.
Step 3: Check Your Blush Formula
Read the manufacturer’s application instructions.
Some jelly blushes work best over bare skin, while others can be layered over foundation.
Step 4: Start with a Small Amount
Dispense a tiny amount of blush onto a clean hand or makeup palette.
You can always add more later.
Step 5: Apply to One Cheek
Use your fingertip, a soft sponge, or a suitable brush.
Place a small amount where you want the most color.
Step 6: Blend Immediately
Tap gently outward to soften the edges.
Avoid rubbing or dragging the product.
Step 7: Repeat on the Other Cheek
Apply a similar amount and blend using the same technique.
Check both cheeks for balanced color.
Step 8: Build Color if Needed
If you want a stronger flush, add another thin layer.
Follow the product’s setting instructions.
Step 9: Finish Your Makeup
Apply setting products only if needed and compatible with your jelly blush.
Avoid heavily rubbing powder or other makeup over the finished blush.
Best Tools for Applying Jelly Blush
Different tools can produce different finishes depending on the formula.
| Application Tool | Best For | Finish | Beginner-Friendly |
|---|---|---|---|
| Clean Fingertips | Small amounts of jelly blush | Natural, controlled | Yes |
| Damp Makeup Sponge | Softening edges | Diffused, sheer | Yes |
| Stippling Brush | Controlled application | Even, softly blended | Yes |
| Dense Makeup Brush | Certain creamier formulas | More concentrated | With practice |
| Makeup Palette | Controlling product amount | Depends on applicator | Yes |
| Small Blending Brush | Precise placement | Targeted, blended | Yes |
Makeup Tip: There isn’t one perfect tool for every jelly blush. The best applicator is the one that distributes your specific formula evenly without disturbing your base.
7 Tips for a Smooth and Natural Jelly Blush Finish
A few simple techniques can make jelly blush much easier to work with.
- Start with hydrated skin. A comfortable, even skin surface can help makeup apply more smoothly.
- Use small amounts. Build pigment gradually instead of applying a large amount at once.
- Blend one cheek at a time. This is especially helpful with quick-setting formulas.
- Use tapping motions. Gentle application can reduce streaking and foundation movement.
- Choose compatible products. Test your jelly blush with your usual skincare and foundation.
- Keep your tools clean. Clean brushes and sponges help maintain consistent application.
- Check your makeup in natural light. Daylight can make uneven edges easier to notice.
Beauty Tip: If you’re new to jelly blush, practice with a small amount on bare or lightly moisturized skin before experimenting with a full makeup base.
Common Jelly Blush Application Myths
There are several misconceptions about jelly blush that can make application more confusing.
Myth 1: Jelly Blush Always Works Better with Fingers
Fingers can work beautifully, but some formulas blend more evenly with a sponge or brush.
The ideal tool depends on the product and your preferred finish.
Myth 2: More Blush Means a Better Glow
Applying too much product can create harsh color and uneven patches.
Thin layers usually provide more control.
Myth 3: Jelly Blush Can Never Be Applied Over Powder
Some formulas may work over lightly powdered skin, but others can become patchy.
Always follow product instructions and test your layering technique.
Myth 4: All Jelly Blushes Have the Same Texture
Jelly blush products vary in pigmentation, water content, finish, and setting time.
A technique that works for one formula may not work for another.
Myth 5: Patchy Blush Always Means the Product Is Bad
Patchiness can result from skin preparation, application technique, product layering, or the formula itself.
Changing one part of your routine may help you identify the cause.
Frequently Asked Questions About Patchy Jelly Blush
Why does my jelly blush look patchy?
Jelly blush can look patchy because of dry skin, excess product, uneven blending, incompatible base makeup, or applying it over too much powder.
Try using a smaller amount and blending gently.
Should jelly blush go before or after foundation?
Many jelly blush formulas are designed to work over bare skin or liquid foundation.
The ideal order depends on the product, so follow its instructions and test your preferred routine.
Can you apply jelly blush with your fingers?
Yes!
Clean fingertips can work well for applying small amounts of jelly blush.
Use gentle tapping motions rather than rubbing.
Is a brush or sponge better for jelly blush?
Both can work.
A soft sponge can help create a diffused finish, while a stippling brush may provide more controlled placement.
How do you fix jelly blush that’s too dark?
Gently soften the edges with a clean sponge.
If the color remains too intense, carefully remove some product and reapply a smaller amount rather than layering more makeup over it.
Can jelly blush work on dry skin?
Yes, depending on the formula.
Moisturizing beforehand and choosing a comfortable, hydrating product may help create a smoother appearance.
How do you make jelly blush last longer?
Start with appropriate skin preparation, apply thin layers, and use compatible setting products when needed.
Wear time varies by formula, skin type, and environmental conditions.
Final Thoughts
Jelly blush can create a beautiful, fresh-looking flush when you apply it with the right technique. 🌸
These 15 jelly blush mistakes that can leave your makeup patchy highlight the small habits that can make a noticeable difference, from proper skin preparation to gentle blending and careful layering.
Whether you’re trying jelly blush for the first time or struggling with streaky application, start with a small amount, work on one cheek at a time, and use a technique that suits your formula.
Save these jelly blush tips to your Pinterest Blush Makeup Tips board so you’ll have an easy reference whenever you want a smooth, natural-looking makeup finish.
Happy blending! ✨
Discover more from Serenity Talks
Subscribe to get the latest posts sent to your email.


