

This Post Contains Affiliate Links. Please Read Our Disclosure for Full Information.
Jelly blush can give your cheeks a fresh, dewy pop of color, but getting a smooth finish takes a little practice! 💗
These 15 jelly blush tips for beginners will help you avoid patchiness, harsh edges, and too much pigment. From skin preparation to blending techniques, you’ll learn how to create a natural-looking flush that feels effortless.
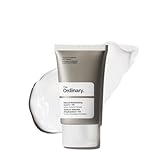
1. Start With Clean, Moisturized Skin
A smooth jelly blush application begins with properly prepared skin.
Wash your face with a gentle cleanser and apply a lightweight moisturizer suitable for your skin type.
Allow the moisturizer to absorb before applying makeup.
Well-prepared skin can help jelly blush glide more evenly instead of catching on dry patches.
Avoid applying heavy layers of skincare immediately before blush, as some formulas may slip or separate.
✨ Beauty Tip: Give your moisturizer a few minutes to settle before applying jelly blush.
Shop lightweight face moisturizers on Amazon.
2. Choose a Beginner-Friendly Jelly Blush Formula
Not all jelly blush formulas behave the same way.
Some have a sheer, buildable finish, while others deliver intense pigment with just one swipe.
If you’re new to jelly blush, choose a formula described as blendable or buildable.
A softer pigment level gives you more time to blend and makes it easier to control the final look.
✨ Beauty Tip: Test a small amount on your hand to understand how quickly the formula sets before applying it to your cheeks.
Shop sheer jelly blush makeup on Amazon.

3. Apply a Small Amount of Jelly Blush First
One of the most common beginner mistakes is applying too much jelly blush at once.
Many jelly formulas are highly pigmented, so a small amount can create noticeable color.
Start with one tiny dot or a light swipe on each cheek.
Blend the product completely before deciding whether you need more.
Building color gradually helps prevent uneven patches and overly bright cheeks.
✨ Beauty Tip: It’s much easier to add another thin layer than to remove excess blush after it sets.
Shop buildable jelly blush on Amazon.

4. Blend Jelly Blush Immediately After Applying
Jelly blush can dry or set faster than traditional cream blush.
If you wait too long before blending, the pigment may leave visible dots or harsh edges.
Apply a small amount to one cheek and blend it immediately.
Once you’re happy with the finish, repeat the process on the other cheek.
This technique gives you better control over the color.
✨ Beauty Tip: Work on one cheek at a time, especially when using a long-lasting jelly blush formula.
Shop jelly cheek blush on Amazon.

5. Use Your Fingertips for a Natural Finish
Your fingertips can be a useful blending tool when applying jelly blush.
Place a small amount of product on your cheek and gently tap it into the skin.
Use light tapping motions rather than dragging the product across your face.
This can help distribute the pigment while maintaining a soft, natural appearance.
Make sure your hands are clean before touching your face.
✨ Beauty Tip: Use your ring finger for gentle blending and avoid rubbing repeatedly over the same area.
Shop jelly blush sticks on Amazon.

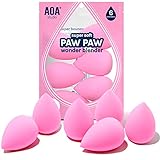
6. Try a Damp Makeup Sponge for Softer Blending
A slightly damp makeup sponge can help soften the appearance of jelly blush.
Apply a small amount of blush to your cheek.
Then gently bounce a clean, damp sponge over the product to diffuse the edges.
Avoid using a soaking-wet sponge, which may disturb your foundation or dilute the blush unevenly.
This method is particularly helpful when you want a subtle flush.
✨ Beauty Tip: Use a clean section of your sponge to blend the outer edges without spreading pigment too far.
Shop makeup blending sponges on Amazon.
7. Apply Jelly Blush to the Right Area of Your Cheeks
Blush placement can change the overall appearance of your makeup.
For a fresh everyday look, apply jelly blush to the upper part of your cheeks and blend outward.
For a softer, rounded appearance, concentrate the color closer to the apples of your cheeks.
Avoid placing too much pigment in one small area.
Choose the placement that complements your face shape and personal style.
✨ Beauty Tip: Start slightly higher on the cheeks and blend gently toward the temples for a lifted-looking finish.
Shop natural pink jelly blush on Amazon.

8. Avoid Applying Jelly Blush Over Heavy Powder
Some jelly blush formulas don’t blend smoothly over heavily powdered makeup.
The moisture in the formula may catch on powder and create uneven patches.
For many products, applying jelly blush over skincare or liquid foundation before setting powder works better.
However, always check the manufacturer’s instructions because formulas vary.
✨ Beauty Tip: If your base is already powdered, test the blush on a small area before applying it across both cheeks.
Shop liquid foundation for natural makeup on Amazon.

9. Build Jelly Blush in Thin Layers
Layering is one of the easiest ways to control jelly blush intensity.
Start with a sheer application and blend until the color looks even.
Allow the first layer to settle before adding a little more.
Focus additional pigment where you want the most color, rather than covering the entire cheek repeatedly.
This technique helps create a gradual, natural-looking flush.
✨ Beauty Tip: Use two thin layers instead of one thick application for better control over the finish.
Shop layerable jelly blush on Amazon.

10. Choose a Jelly Blush Shade That Complements Your Skin Tone
Choosing a flattering shade can make jelly blush easier to wear every day.
Soft pinks, peaches, berries, and rosy tones create different effects depending on your complexion and undertone.
Try shades that complement your natural skin coloring rather than relying only on how the product looks in its packaging.
Remember that sheer jelly blush may appear different once blended onto the skin.
✨ Beauty Tip: Swatch blush on your cheek or jaw area in natural lighting when possible to see how the color looks against your complexion.
Shop jelly blush color collections on Amazon.
11. Use a Small Brush for More Precise Application
A small, soft makeup brush can help you control where jelly blush goes.
Choose a brush suitable for liquid or cream products.
Apply a little blush to the back of your clean hand or a makeup palette.
Pick up a small amount with the brush and gently stipple it onto your cheeks.
This method helps prevent concentrated dots of pigment.
✨ Beauty Tip: Use short tapping motions instead of long sweeping strokes, especially with fast-setting formulas.
Shop cream blush makeup brushes on Amazon.

12. Soften Harsh Edges With a Clean Sponge
If your jelly blush looks too concentrated, you don’t always need to remove it.
Take a clean makeup sponge and gently tap around the edges of the blush.
This can help soften the transition between the color and your foundation.
If needed, use a tiny amount of your usual base product on the sponge to diffuse the edges.
Avoid rubbing aggressively, which may disturb the makeup underneath.
✨ Beauty Tip: Focus on blending the edges while keeping the center of the blush slightly more pigmented.
Shop soft makeup sponges on Amazon.
13. Let Jelly Blush Set Before Adding Other Products
Applying additional makeup too quickly can disturb your jelly blush.
After blending, allow the product to settle according to its formula.
Then apply any additional face makeup using gentle motions.
If you want to set the area, use a small amount of finely milled powder only if it works well with your blush.
✨ Beauty Tip: Avoid repeatedly touching your cheeks while the blush is setting to reduce smudging and patchiness.
Shop translucent setting powders on Amazon.

14. Check Your Jelly Blush in Natural Lighting
Bathroom lighting can make blush appear lighter or darker than it really is.
After applying your makeup, check your cheeks near a window with natural daylight.
Look for uneven patches, visible edges, or differences between the two cheeks.
Make small adjustments if necessary.
This simple step can help you achieve a more balanced everyday makeup look.
✨ Beauty Tip: Check your blush from the front and at slight angles to make sure the color blends smoothly.
Shop lighted makeup mirrors on Amazon.

15. Practice With a Simple Everyday Jelly Blush Routine
The easiest way to master jelly blush is to develop a simple routine.
Start with clean, moisturized skin and apply your usual lightweight base makeup.
Add a small amount of jelly blush to one cheek and blend immediately.
Repeat on the other side, then check the result in natural lighting.
As you become more comfortable, experiment with different shades and application tools.
✨ Beauty Tip: Practice with a sheer shade on a day when you’re not rushing so you can learn how your formula behaves.
Shop beginner jelly blush makeup on Amazon.
How to Apply Jelly Blush for an Even Finish
Follow this beginner-friendly application routine:
- Cleanse your face. Start with clean skin.
- Apply moisturizer. Choose a lightweight formula suitable for your skin type.
- Apply your base makeup. Use foundation or concealer if desired, avoiding excessive powder before blush.
- Choose a flattering shade. Start with a sheer pink, peach, or rosy tone.
- Apply a small amount. Place one tiny dot or swipe on your cheek.
- Blend immediately. Use clean fingertips, a sponge, or a suitable brush.
- Work on the second cheek. Repeat the same technique.
- Check for uneven areas. Gently soften harsh edges.
- Build color if needed. Add another thin layer rather than applying too much at once.
- Let the product set. Finish your makeup according to the formula’s instructions.
Best Jelly Blush Application Tools for Beginners
| Application tool | Best for | Finish |
|---|---|---|
| Clean fingertips | Quick everyday application | Natural and soft |
| Damp makeup sponge | Diffusing strong pigment | Sheer and blended |
| Small stippling brush | Controlled application | Smooth and precise |
| Dense cream blush brush | Building color gradually | Even and polished |
| Makeup palette | Controlling product amount | Less product waste |
| Clean blending sponge | Softening harsh edges | Seamless transition |
How to Choose the Right Jelly Blush Shade
Jelly blush shades can look different depending on your skin tone, undertone, and the formula’s transparency.
| Jelly blush shade | Overall makeup effect |
|---|---|
| Soft pink | Fresh and youthful-looking |
| Peach | Warm and natural |
| Rosy nude | Subtle everyday flush |
| Coral | Bright and lively |
| Berry | Rich and noticeable |
| Mauve | Soft and sophisticated |
| Warm rose | Natural and flattering |
| Deep plum | Bold and dramatic |
These are styling suggestions rather than strict rules. Any shade can work beautifully when applied in a way that suits your preferences.
Common Jelly Blush Mistakes to Avoid
Jelly blush can look patchy when the application technique doesn’t suit the formula.
Here are some common mistakes and how to fix them:
Applying Too Much Product
Start with a tiny amount and build gradually.
Waiting Too Long to Blend
Work quickly with formulas that set fast.
Rubbing Instead of Tapping
Use gentle tapping motions to avoid disturbing your foundation.
Applying Over Excessive Powder
Test product compatibility and consider applying jelly blush before setting powder.
Using a Dirty Makeup Sponge
Clean application tools regularly to reduce product buildup and uneven blending.
Ignoring the Edges
Blend the outer edges carefully so the blush transitions naturally into your skin.
Choosing a Shade Without Testing It
Swatch the color when possible, because jelly formulas can look different once blended.
How to Make Jelly Blush Look More Natural
For a soft everyday flush, try these simple techniques:
- Start with a sheer formula.
- Use less product than you think you need.
- Blend one cheek at a time.
- Concentrate color where you naturally like to wear blush.
- Keep the outer edges softly diffused.
- Choose a shade that complements your everyday makeup.
- Avoid layering too many products over the blush.
- Check your makeup in natural daylight.
- Keep the rest of your face makeup simple when you want the blush to look subtle.
Jelly Blush vs. Cream Blush vs. Powder Blush
| Feature | Jelly blush | Cream blush | Powder blush |
|---|---|---|---|
| Texture | Gel-like or bouncy | Creamy | Dry powder |
| Typical finish | Fresh, sheer, or dewy | Natural to luminous | Matte to radiant |
| Application | Fingers, sponge, or brush | Fingers, sponge, or brush | Makeup brush |
| Blending time | Can set quickly | Often more flexible | Depends on formula |
| Buildability | Varies by product | Usually buildable | Usually buildable |
| Best beginner approach | Start with tiny amounts | Blend gradually | Apply in light layers |
The best blush formula depends on your skin preferences, makeup routine, and the specific product.
Jelly Blush Tips for Different Skin Types
Dry Skin
Apply a suitable moisturizer before makeup and avoid excessive powder.
Choose a formula that doesn’t emphasize dry patches.
Oily Skin
Use lightweight skincare and allow each layer to settle.
If necessary, apply a small amount of compatible setting powder after the blush has dried.
Combination Skin
Adjust your skincare preparation depending on which areas feel dry or oily.
Use thin blush layers to avoid uneven buildup.
Sensitive Skin
Check the ingredient list, patch-test new products according to their instructions, and discontinue use if irritation occurs.
Avoid applying makeup over broken or irritated skin.
Frequently Asked Questions About Jelly Blush
Is jelly blush good for beginners?
Yes. Jelly blush can be beginner-friendly, especially when you choose a sheer, buildable formula. Start with a small amount and blend immediately for better control.
Should jelly blush go before or after foundation?
Many jelly blush formulas work well over liquid foundation and before setting powder. However, the ideal order depends on the product, so check the manufacturer’s instructions.
Can you apply jelly blush with your fingers?
Yes. Clean fingertips are useful for gently tapping jelly blush into the skin. This method can create a soft, natural-looking finish.
Why does my jelly blush look patchy?
Patchiness can happen when you apply too much product, wait too long to blend, or layer incompatible formulas. Try using less blush, working one cheek at a time, and blending with gentle tapping motions.
How do you make jelly blush last longer?
Prepare your skin, apply thin layers, allow the blush to set, and avoid rubbing your cheeks. If compatible with your formula, a light setting product may help maintain the finish.
Final Thoughts
Jelly blush can be a fun and easy way to add a fresh pop of color to your everyday makeup routine. 💗✨
With these 15 jelly blush tips for beginners who want an even finish, you can learn how to apply the right amount, blend smoothly, and create a natural-looking flush without harsh edges.
Start with a sheer formula, work in small sections, and practice using the application tool that feels most comfortable.
Remember, beautiful blush doesn’t require complicated techniques. A little product, gentle blending, and the right placement can make all the difference.
Save these 15 jelly blush tips to your Pinterest makeup tips board so you’ll always have an easy beginner-friendly guide for creating smooth, beautiful cheeks.
Here’s to fresh makeup looks, effortless blending, and finding your perfect jelly blush routine! 💕
Discover more from Serenity Talks
Subscribe to get the latest posts sent to your email.


